Getting Started
Step 1: Create your account
- Go to app.fluidgrids.ai and click Sign up.
- Fill in First Name, Last Name, Username (letters, numbers, underscores, hyphens), Email, and Password. The password must be at least 12 characters and include an upper-case letter, a lower-case letter, a number, and a special character. The strength meter turns green when it qualifies.
- Complete the reCAPTCHA and click Create account.
- You will see Check your email. Open the verification link. If it has not arrived after a minute, check your spam folder or click try again to resend it.
Social sign-up buttons (Google, Microsoft, GitHub) appear on the form when your organisation has enabled them. If a button says it is not configured, use email and password instead.
Step 2: Sign in
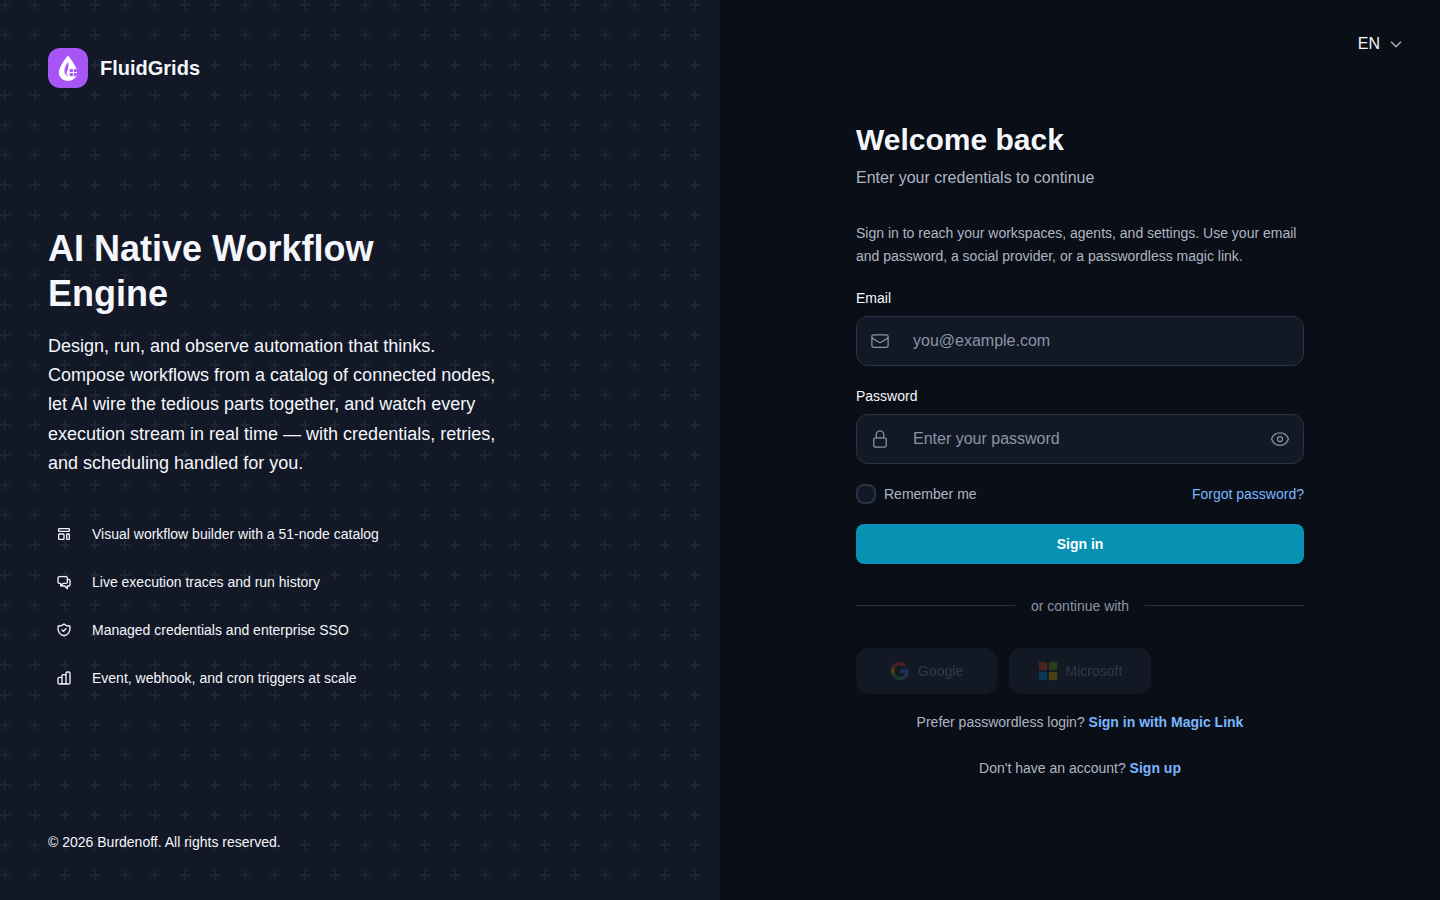
Sign in with the email and password you registered. Two alternatives are always available:
- Sign in with Magic Link — enter your email and click Send Magic Link. The link in the email signs you in without a password and expires after 24 hours.
- Forgot password? — sends a reset link.
If your organisation enforces multi-factor authentication you will be asked for your authenticator code next. See Account and Sign In.
Step 3: Pick a workspace
Everything in FluidGrids belongs to a workspace: workflows, runs, connections, versions, and quotas. A personal workspace is created for you at sign-up, so most people go straight to the app.
If you belong to more than one workspace you will see Select Your Workspace after signing in. Choose one and click Continue. You can switch later from the profile menu (Switch Workspace) or from the workspace switcher in the header.
To create another workspace, open Administration › Workspaces in the sidebar and click Create Workspace (name, slug, and the organisation that owns it). Workspaces count against your plan.
Step 4: Read the Dashboard
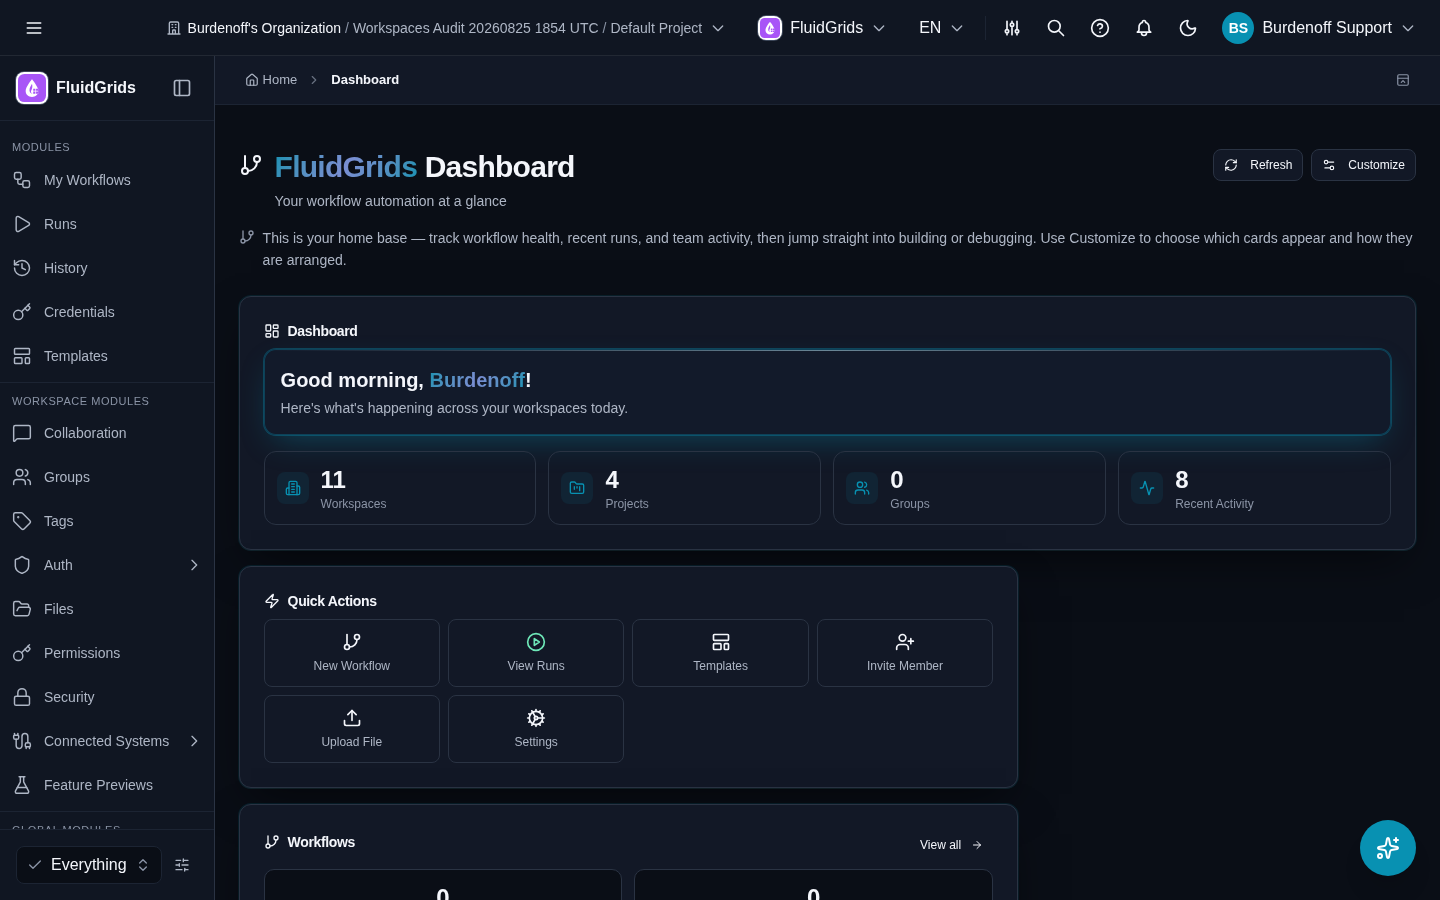
After sign-in you land on the FluidGrids Dashboard — Your workflow automation at a glance. The top card greets you and shows counters for Workspaces, Projects, Groups, and Recent Activity; the counters are summaries, not links. Quick Actions below it are the launch pad: New Workflow, View Runs, Templates, Invite Member, Upload File, Settings. A Workflows card shows your workflow and run counts with a View all link. Customize chooses which cards appear.
Step 5: Find FluidGrids in the sidebar
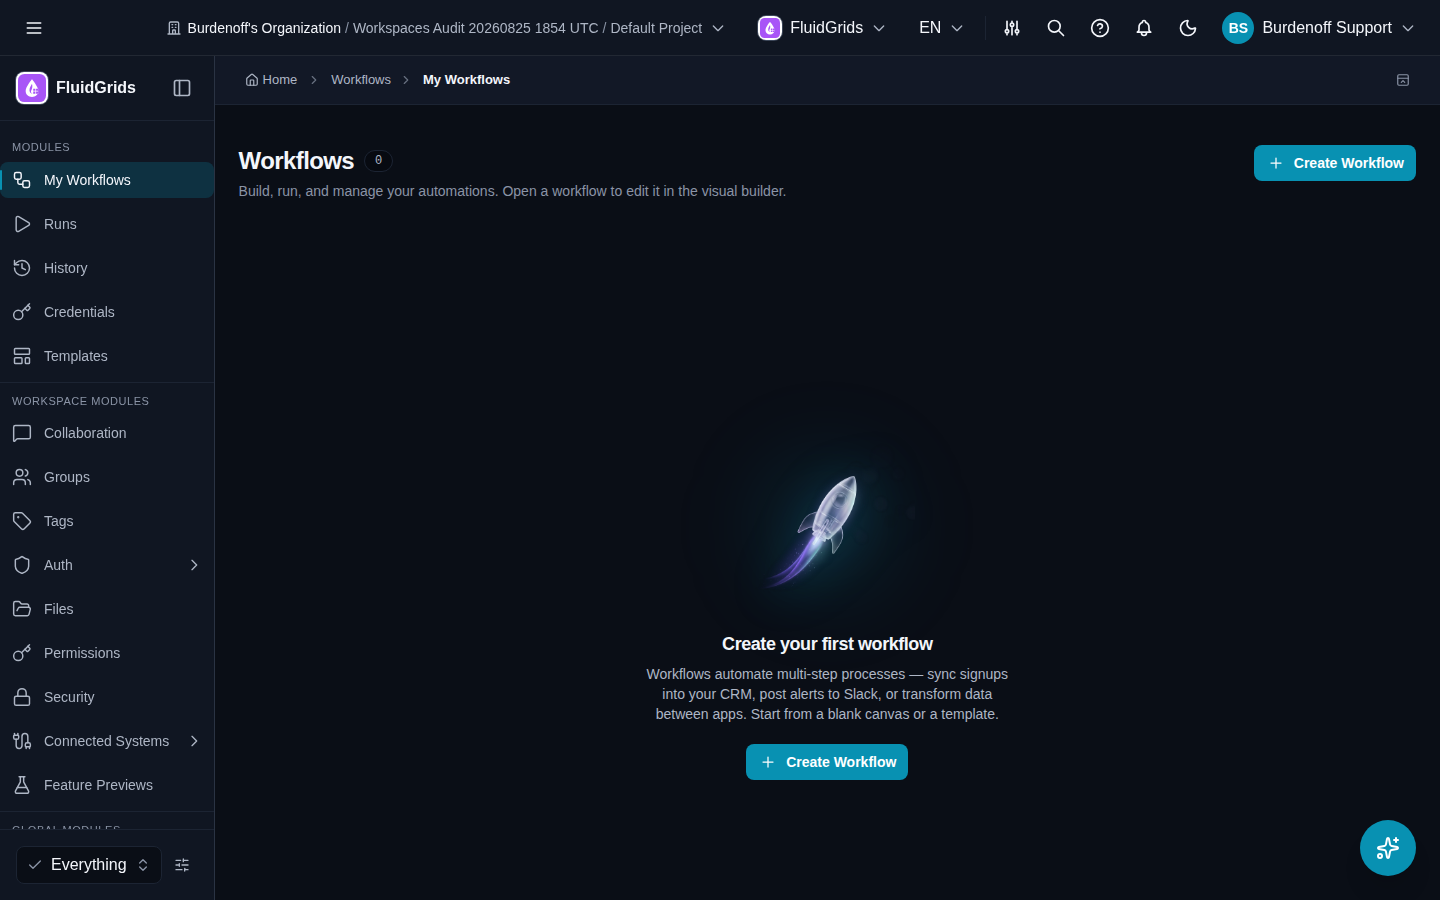
The sidebar has three groups. FluidGrids is the first one:
Modules
| Item | What it is |
|---|---|
| My Workflows | Your workflows. Start here to create or open one. |
| Runs | Every execution, live and historical, with per-node detail. |
| History | Version History — every saved version of every workflow. |
| Credentials | Connections to external services. Opens the Connections screen. |
| Templates | Workflows you can copy as a starting point. |
Workspace Modules hold shared workspace features (Collaboration, Groups, Tags, Auth, Files, Permissions, Security, Connected Systems, Feature Previews). Global Modules hold account-level features (Administration, Billing, Marketplace, Communication, Support, Developer Portal). Navigating the App explains each.
What you see depends on your role. A Run Operator, for example, sees Runs and History but not the builder. Items your role can use but that are not part of its default view are collapsed behind N more…; the selector at the bottom of the sidebar (Everything) and the customise icon next to it control this. See Roles and Permissions.
Step 6: Create and run your first workflow
- Open My Workflows and click Create Workflow. The Visual Builder opens with an empty canvas (Add a trigger to start) and the Node Store panel on the right.
- In the Node Store, open Triggers and drag Trigger Manually onto the canvas. Then click the trigger's + handle, open Core, and pick HTTP Request. It is added and connected automatically.
- Single-click the HTTP Request node to open its quick-configuration panel. Set the method to
GETand the URL tohttps://httpbin.org/get. - Click the title Untitled Workflow to rename it, then click Save. Saving creates version 1.
- Click Run. The Logs panel streams the execution; each node shows its status on the canvas.
- Open Runs. The run is listed as Completed; click it to see the node Timeline, Logs, Input Data, and Context.
That is a complete manual workflow. To make it run on its own, click Activate in the builder toolbar and give it a Webhook or Schedule trigger — see Workflows.
What's next
- Visual Builder — every panel and control on the canvas
- Credentials — connect Gmail, Slack, GitHub, and the other services before you use their nodes
- Templates — copy a working workflow instead of starting blank
- AI Assistant — describe what you want and let FluidGrids AI draft the workflow