Quick Start
This guide gets you from a new account to a workflow that has run successfully. Everything here happens in the web app; the CLI and SDKs are optional and covered at the end.
Step 1: Create an account and sign in
- Open app.fluidgrids.ai and click Sign up.
- Enter your first name, last name, a username, your email, and a password (at least 12 characters with upper case, lower case, a number, and a special character).
- Open the verification email and click the link. Check your spam folder if it does not arrive within a minute.
- Sign in with your email and password. You can also use Sign in with Magic Link to receive a one-time sign-in link instead of typing a password.
Signing up creates a personal workspace for you. See Account and Sign In for the other sign-in options, MFA, and workspace switching.
Step 2: Find your way around
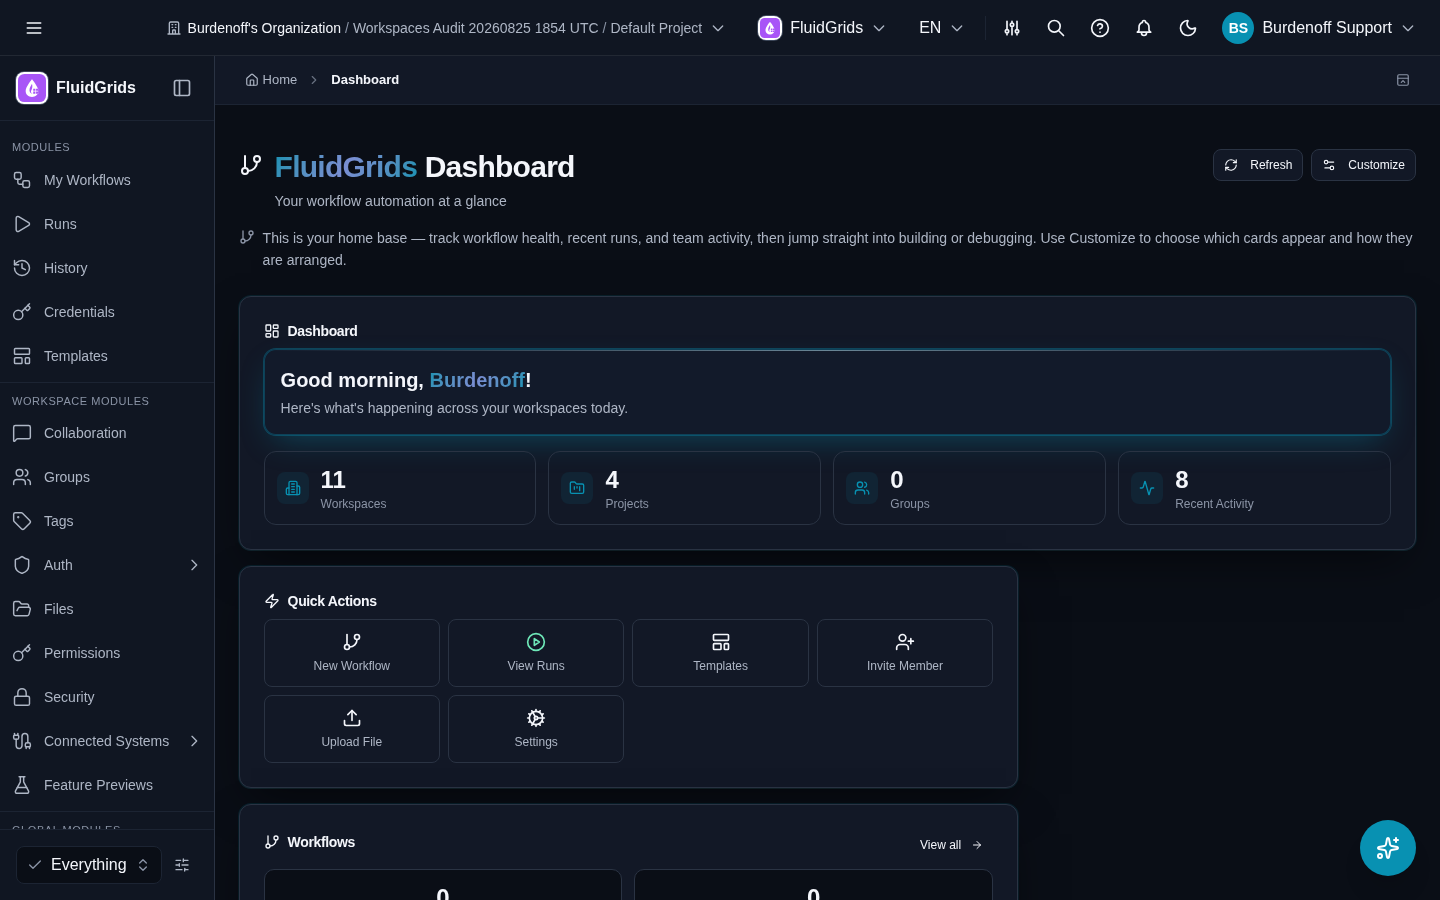
After sign-in you land on the FluidGrids Dashboard: counters for your workspaces, projects, groups, and recent activity, plus Quick Actions (New Workflow, View Runs, Templates, and more). The FluidGrids screens live in the sidebar under Modules:
| Sidebar item | What it opens |
|---|---|
| My Workflows | Your workflow library — search, filter by status, create, open, duplicate, share, delete |
| Runs | The Executions screen — every run, its status, and its per-node detail |
| History | Version History — every version of every workflow, with who changed it and when |
| Credentials | Connections — the OAuth and API-key connections your nodes use |
| Templates | Reusable workflows from your workspace and from the Store |
The two groups below it, Workspace Modules and Global Modules, are shared platform features (files, tags, permissions, billing, the marketplace, and so on). Navigating the App walks through all of them.
Step 3: Create your first workflow
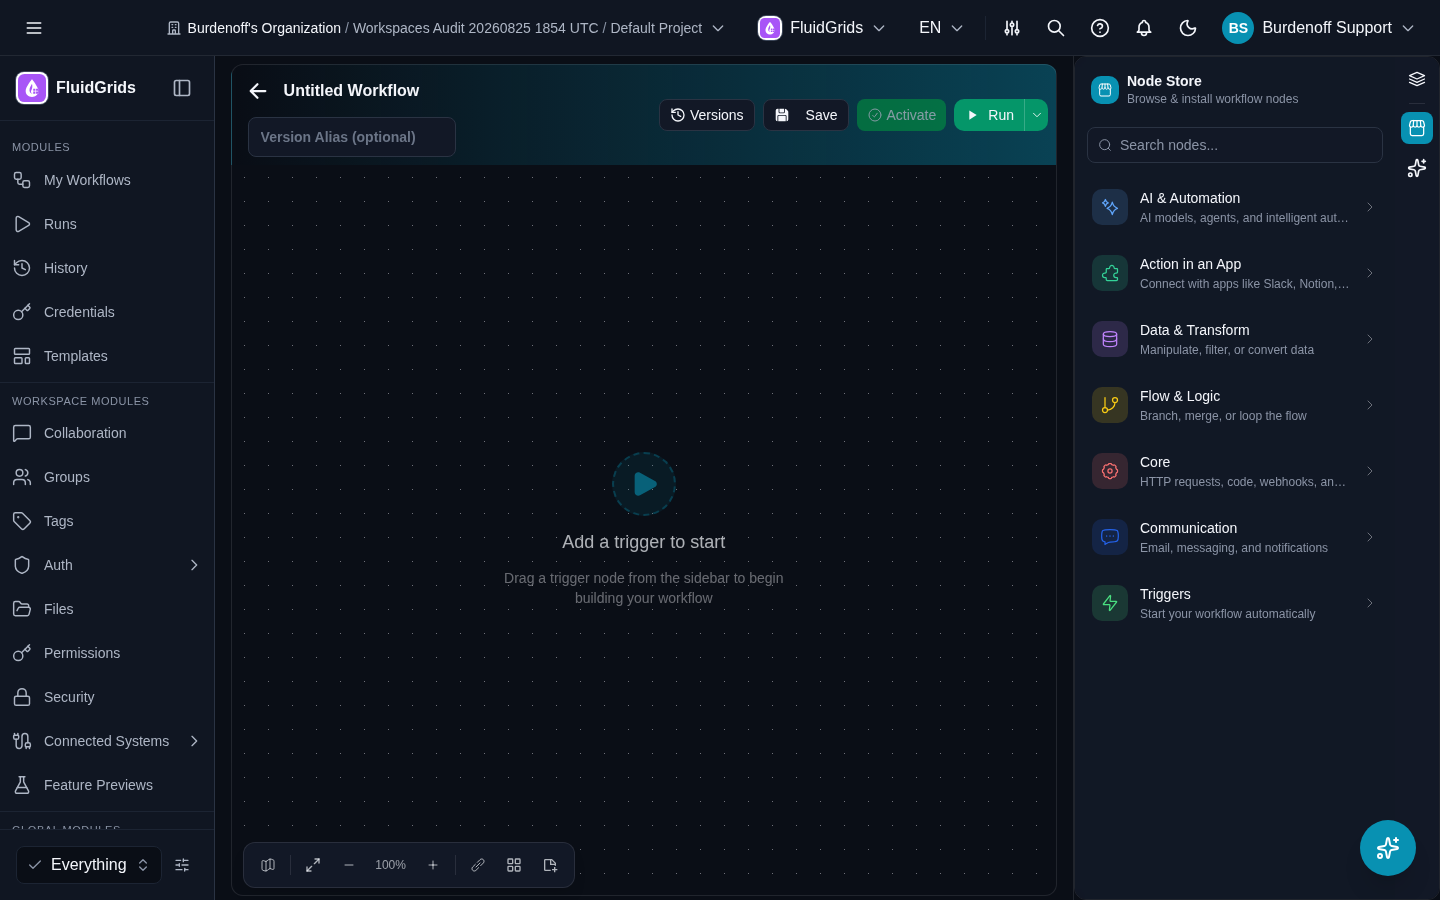
- Click My Workflows, then Create Workflow. The Visual Builder opens with an empty canvas that says Add a trigger to start, and the Node Store panel open on the right.
- In the Node Store, open Triggers and drag Trigger Manually onto the canvas.
- Click the + handle on the trigger node. The Node Store switches to attach mode; open Core and choose HTTP Request. It is added to the canvas and wired to the trigger.
- Single-click the HTTP Request node. The quick-configuration panel opens beside it. Set Method to
GETand URL tohttps://httpbin.org/get. Changes apply instantly. - Give the workflow a name by clicking the title at the top of the canvas (it starts as Untitled Workflow).
- Click Save. The builder validates the flow first — every node must be connected, and the flow must start at a trigger — then stores it as version 1.
Step 4: Run it and read the result
- Click Run. The builder validates the flow again and starts an execution.
- The Logs panel at the bottom of the canvas streams the run as it happens. Each node card shows its status.
- Open Runs in the sidebar. Your run appears at the top with status Completed. Click it to see the Timeline of nodes, the Logs, the Input Data, and the run Context. Each node in the timeline shows its input and output.
If the run failed, the failing node is highlighted and the error is shown in the node's detail. Troubleshooting lists the common causes.
Step 5: Make it run on its own
A workflow only runs automatically once a version is Active. Every save creates a new version; nothing becomes Active on its own.
- In the builder, click Activate in the toolbar (or open Versions and choose Activate this version on the version you want).
- The workflow's status becomes Active.
- Replace the manual trigger with a Schedule Trigger (cron or interval) or a Webhook Trigger (a unique URL you can POST to). Save again and activate the new version.
Webhooks and schedules always execute the Active version, so you can keep editing drafts without affecting what is live. See Workflows.
Optional: drive it from the command line
The CLI and SDKs use the same GraphQL API the app uses. They are built from source today — none is on a package registry yet.
git clone https://github.com/algoshred/fluidgrids-sdk-node.git
git clone https://github.com/algoshred/fluidgrids-cli.git
(cd fluidgrids-sdk-node && bun install && bun run build)
(cd fluidgrids-cli && bun install && bun run build && bun link)

fluidgrids auth login YOUR_EMAIL      # prompts for the password
fluidgrids workflows list
fluidgrids workflows trigger WORKFLOW_ID
fluidgrids runs list
See the CLI Reference, Node SDK, and Python SDK.
What's next
- Visual Builder — every panel and control on the canvas
- Credentials — connect Slack, Gmail, GitHub, and the other store nodes
- Templates — start from a working workflow instead of a blank canvas
- AI Assistant — describe the workflow you want and let FluidGrids AI draft it